MAIDA MURUKKU
 |
| MAIDA MURUKKU |
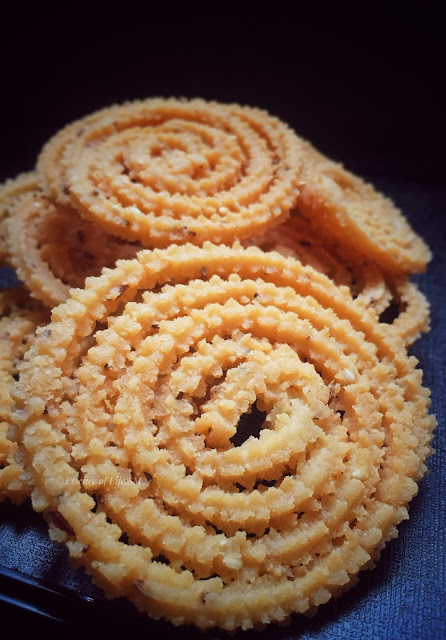
Yet another easy Murukku Recipe with All-purpose Flour or the one & only Indian Maida. As you can see, I have never changed all these years. Still, basking around with simple recipes when it comes to Murukku making. Compared to the Classic Murukku recipes I am as usual sticking on to the quick-fix ones, procrastinating the idea of making Murukku from scratch.
Maida Murukku is a not-so-traditional twist given to the classic Murukku recipe, prepared with all-purpose flour. An instant Murukku recipe which needs no soaking, drying, grinding or running to the flour mill. When I saw this recipe, I was wondering - a Murukku with All-purpose Flour? Knowing the nature of the flour & its high gluten content, when kneaded, I was damn sure it was going to be sticky in standards of making Murukku. But the trick here is to get rid of the gluten making the flour suitable for making Murukku. I am awestruck by the inventiveness of the mind whoever came up with a Murukku Recipe with All-purpose Flour.
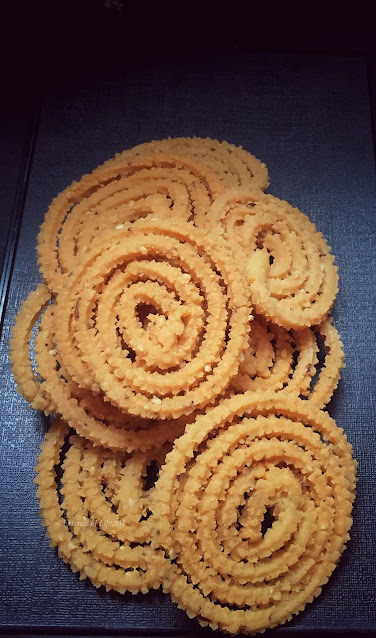
Ok, let's see how to get rid of the gluten content from the flour. It's so simple, steam cook the flour for about 40-50 minutes and there it is. The flour loses its gluten, facilitating it perfect for making Murukkus. Rest of the job gets easier & can be done within minutes once the flour is steam cooked. Knead it up with roasted gram dhal flour(pottukadali powder) and a bit of spice & seasonings for an extra note of flavour and taste. This Maida Murukku turned out to be perfect, crispy, non-oily and a tasty Murukku.
Maida Murukku Recipe is a simple version for those who want Instant Snacks or for those who find short of time in getting the festive delicacies ready. Maida Murukku can be one easy addition to your 'DIWALI BAKSHANAM' list. Try your hand with this easy, crispy & flavourful Murukku Recipe for this festive season. Or simply snack it around or serve it as a Tea Time Snack.
For more MURUKKU RECIPES, Click here...
Cuisine - Indian
Recipe Type - Snacks
Spice Level - Low
Difficulty - Medium
Yields - 35-40 Medium-sized Murukkus
Author - SM
Preparation Time - 25-30 Minutes
Cooking Time - 30 -45 Minutes
For more recipes on SNACKS & SAVOURIES, Click here...
HOW TO MAKE MAIDA MURUKKU - MURUKKU WITH ALL-PURPOSE FLOUR
 |
| MAIDA MURUKKU |
INGREDIENTS:
All-purpose Flour(Maida) - 500 GmsRoasted Gram Dhal Flour(Pottukadalai) - 1 Tbspn
Melted Ghee/Warm Oil - 1 Tbspn
Dry Red Chillies - 4-5 Nos.(Optional)
Ajwain/Cumin Seeds - 1 Tspn
Asafoetida - 1/4 Tspn
Salt - To Taste
Warm Water - 1 Cup(Approximately)
To Deep Fry:
Oil
 |
| MAIDA MURUKKU |
METHOD:
For Steaming All-Purpose Flour:
- Sieve All-purpose Flour once and spread it on a clean kitchen cloth.
- Bring the edges together and tie the cloth into a loose potli(a bag-like).
- Meanwhile, fill the steamer with enough water and bring it to boil.
- Place the steamer plate & then flour filled potli over it.
- Cover the lid of the steamer.
- Once the water boils, reduce the flame to medium-low.
- Steam cook the flour for about 45-50 minutes.
- Check the water level in the steamer and if the water has reduced add few cups of hot water into it.
- Switch off the flame after 45 -50 minutes.
- Remove the cloth with the flour and leave it outside for a few minutes.
- Carefully open the flour filled cloth and transfer the flour into a large plate.
- Break the lumps formed with a spoon/ladle(It will be too hot to handle with bare hands).
- Do this step when the flour is hot. If the flour cools down, the lumps stick together making the task difficult.
- Now, once again sieve the flour and keep it aside.
For Maida Murukku:
- Meanwhile, powder the Roasted Gram Dhal/Pottukadalai into a fine powder.
- Sieve it once and keep it aside.
- Soak Dry Red Chillies in hot water for about 10-15 minutes.
- Drain and discard the water used for soaking Dry Chillies or use it while kneading the dough.
- Grind the Soaked Dry Red Chillies in a blender or a small mixer-grinder jar.
- Grind this into a fine paste. Alternatively can add a Tspn of Red Chilli Powder too.
- Melt the Ghee and keep it aside.
- Mix Dry Red Chilli paste along with steamed All-purpose Flour, Pottukadalai Powder, melted warm ghee/oil, Ajwain/Cumin seeds, Asafoetida, Sesame Seeds and a dash of Salt.
- Pour in the warm water to the above mix, little at a time and knead it into a smooth & soft dough.
- The dough should be pliable and kneaded without any cracks.
- Leave the dough aside for about 5-10 minutes.
To Fry Maida Murukku:
- Heat oil in a deep pan.
- Place some dough into the Murukku Mould and press the dough through it.
- Make a few swirls onto the reverse surface of a slotted spoon or directly press the Murukkus into the oil.
- Drop the shaped murukkus gently into the hot oil, fry the Maida Murukku until it turns into golden brown and the sizzling sound stops.
- Drain the Maida Murukkus on a Paper Towel.
- Follow suit for rest of the dough.
- Allow the Maida Murukkus to cool down completely before storing.
- Store the Maida Murukkus in airtight jars.

MAIDA MURUKKU

NOTES:
- Break the lumps from the steam-cooked flour, when it is still hot.
- Use a wooden spoon/ladle for the purpose and then sieve the flour before kneading it.
- Do this step when the flour is hot & if the flour cools down, the lumps stick together making the task difficult.
- The dough should be of the correct consistency. It should not be sticky or too hard and without any cracks.
- Can substitute warm melted Ghee with warm oil.
- Use warm water for kneading the dough.
- Adding dry chillies to the recipe is optional.
- Powder the Roasted Gram Dhal/Pottukadalai into a fine powder and sieve it once.
- You can press the Maida Murukkus directly into the oil.
- If stored properly, it lasts up to a week to 10 days.
SHOP RELATED PRODUCTS:


0 comments